Building an 8" pier for smaller telescopes
Copyright © 2021 DWH Products and pierplates.com. All Rights Reserved.
Building an 8" Pier for Smaller Telescopes
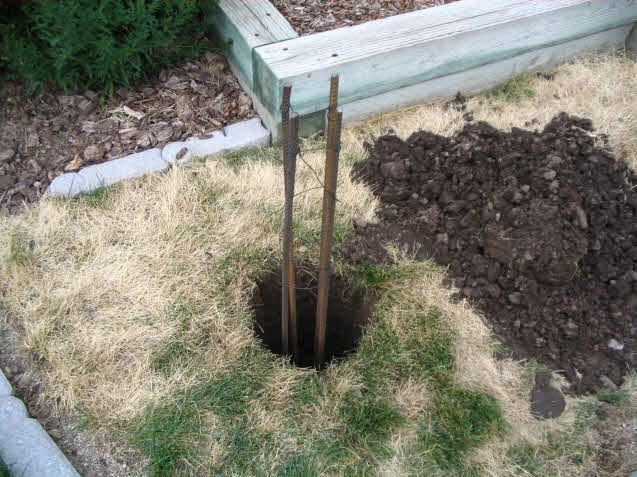
The hole was dug using a post-hole digger. The diameter is 10-12" and the depth was 30". The depth is determined by local codes and must be below the frost line. The bottom 8-12" was widened using a hand shovel and flares out in a bell-shape to a diameter of about 16". The lower portion acts as a footing.
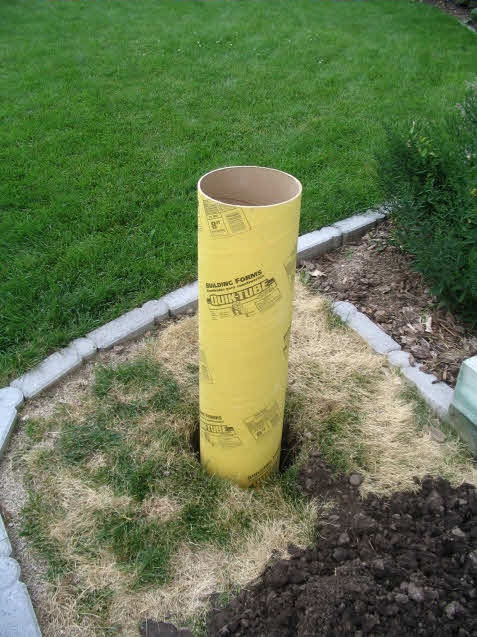
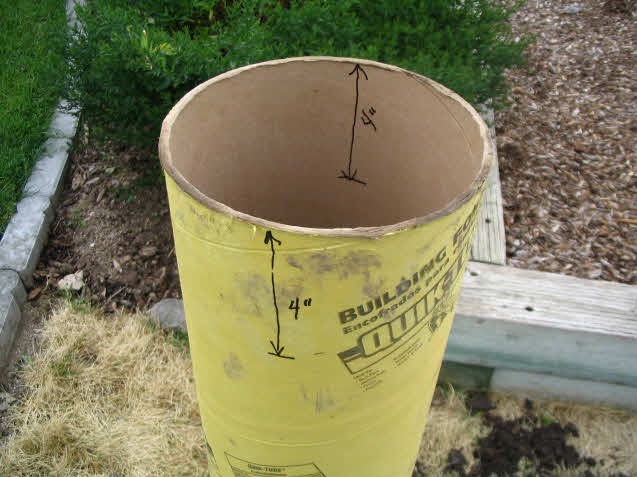
The 8" concrete form can be purchased at a local hardware store. These forms come in various diameters and lengths. This form was 5' in length.
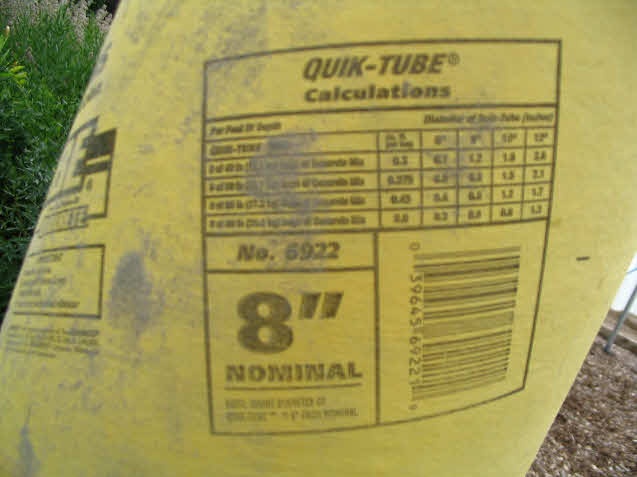
The concrete form had a calculator printed on its side to determine the amount of concrete needed to fill the form. In our case we used (4) 80lb bags of premixed concrete rated at 5000psi. We like the heavier concrete because it is more workable and is easier to finish.
We added (4) 1/2" diameter steel rebar and wired them together.
We left room in the top of the form to seat the anchor bolts, so the rebar ended up about 10" from the top of the form.
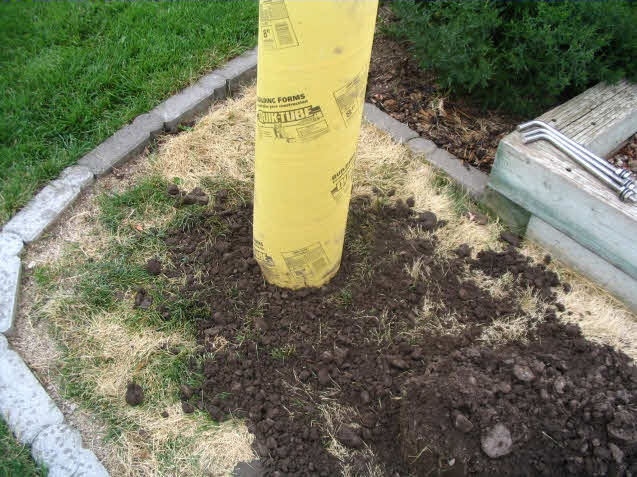
We mixed the concrete by hand in a wheel barrow and filled the footing. Right away we pushed the concrete form down into the concrete to our predetermined depth.
We packed the gap around the form with heavy soil to hold the form in place while we filled it with concrete. This method works surprisingly well and didn't require any additional bracing.
The 8" diameter pier top plate was wrapped in plastic food wrap several layers thick to protect it from the concrete and the 5/8" diameter stainless steel anchor bolts were attached. These anchor bolts are smaller than the 3/4" bolts we use for our 12" diameter plates.
We marked the form to leave a 4" gap between the top of the concrete and the top of the pier plate. We like to have plenty of room under the pier plate to reach into with our hands. The pier plate would probably look better with a smaller gap however and it could be as little as 2-1/2" or less if one were willing to remove the plate any time a bolt were to be attached to a telescope.
Concrete was added to the mark and the entire form was pushed and nudged until completely level from various angles.
The pier top plate and anchor bolt assembly was pushed down into the concrete until the top of the plate was even with the top of the form. It took a little muscle but it will ensure that the plate is perfectly concentric with the pier. We rapped on the pier to get the concrete to settle and reduce voids.
We let the concrete cure for 3-4 days. It cures slowly inside the form, which is good. Afterwards we stripped the cardboard form off. We had to remove some of the soil around the base of the pier to get most of the cardboard. We also applied a plaster coating to the pier to give it better garden appeal. This is easily done using foundation plaster and mixing it to the consistency of oatmeal. We spread it on with our hands and a big floppy masonry brush. It leaves a semi-rough, sandy surface. We also added the adapter plate for CG-5 (also EQ3 etc.)
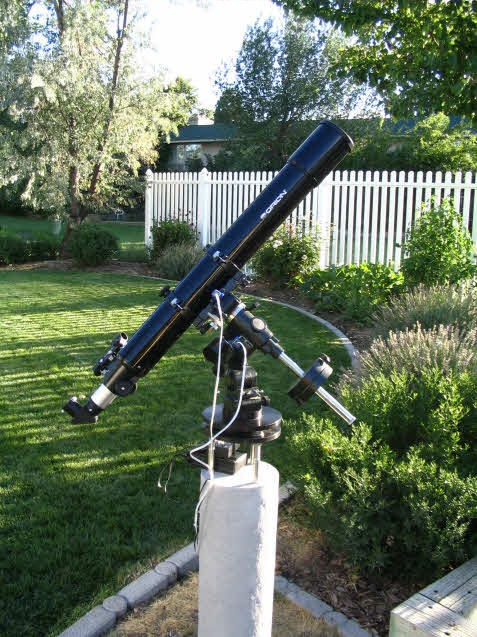
This 80mm Orion refractor never had it so good! A heavy rap on the concrete pier damps out so fast we couldn't time it. This class of pier could easily field a scope up to 8". Not bad for less than $100 USD worth of building materials plus a Dan's Pier Top Plate.